Site Navigation
- COSMOS Testbed Overview
- Getting Started
- COSMOS/ORBIT User Guide
- COSMOS Portal
- Account Management
- Portal Dashboard
- Directory
- Disk Images
- Community Forum
- Getting Started with the COSMOS Portal
- SSH Access to Testbed Nodes
- Scheduler
- Testbed Status
- Installing Chrome Remote Desktop (CRD) on a Custom Image
- Tutorials
- Architecture
- Resources, Services and APIs
- Datasets
- Hardware Info
- RF Policies & Compliance
FR3 SDRs
This setup is designed for advanced wireless research and prototyping in FR3 frequency bands, supporting next-generation 5G/6G air interface and 2×2 MIMO experimentation.

As can be seen in the block diagram, the COSMOS FR3 experimental setup consists of two units each using a combination of USRP-2974 (Krypton) SDRs and Pi-Radio FR3 SDR front-end hardware. The Pi-Radio FR3 SDR units can be configured to operate across the entire 6 GHz to 24 GHz range, supporting experimentation in the full FR3 band.
Pi-Radio FR3 SDR
The Pi-Radio FR3 front-end includes a wideband RF transceiver board capable of two-stage up- and down-conversion to meet stringent out-of-band (OOB) and adjacent channel rejection (ACLR) requirements, as well as strict spectral masks. Each FR3 front-end supports 2×2 MIMO via connections to a pair of Vivaldi antennas for transmit (Tx1, Tx2) and receive (Rx1, Rx2). The digital baseband board allows the FR3 front-end to be connected via SMA cables to any sub-6 GHz SDR (e.g., USRP, Xilinx RFSoC, Pluto), providing maximum flexibility for rapid prototyping and experimentation in upper mid-band/FR3 spectrum. The platform supports advanced research use cases such as end-to-end 5G/6G Open Air Interface (OAI) links, O-RAN compliant radio units, and channel sounding for propagation and spatial studies.
USRP-2974 (Krypton):
The USRP-2974 is an integrated software-defined radio platform with a quad-core Intel i7 processor, 8 GB RAM, 256 GB SSD, and embedded X310 radio supporting wideband operation. It supports high-throughput data movement either via the internal PCI Express bus or external 10 GbE, providing a flexible and powerful baseband processing environment for advanced wireless prototyping.
The USRP-2974 connects to the Pi-Radio FR3 SDR front-end module through a set of 20 dB attenuators, which perform up/down-conversion between sub-6 GHz and FR3 frequencies. The units are interconnected via dual sub-6 GHz RF paths with variable attenuation, enabling flexible RF experimentation and emulation of over-the-air links.
The FR3 RF front-ends are configured over Ethernet at addresses rfdev-sdr1-piradio.sb1.cosmos-lab.org and rfdev-sdr2-piradio.sb1.cosmos-lab.org, while the two baseband USRPs can be accessed via sdr1-piradio.sb1.cosmos-lab.org and sdr2-piradio.sb1.cosmos-lab.org.
Controlling the Pi-Radio FR3 SDRs
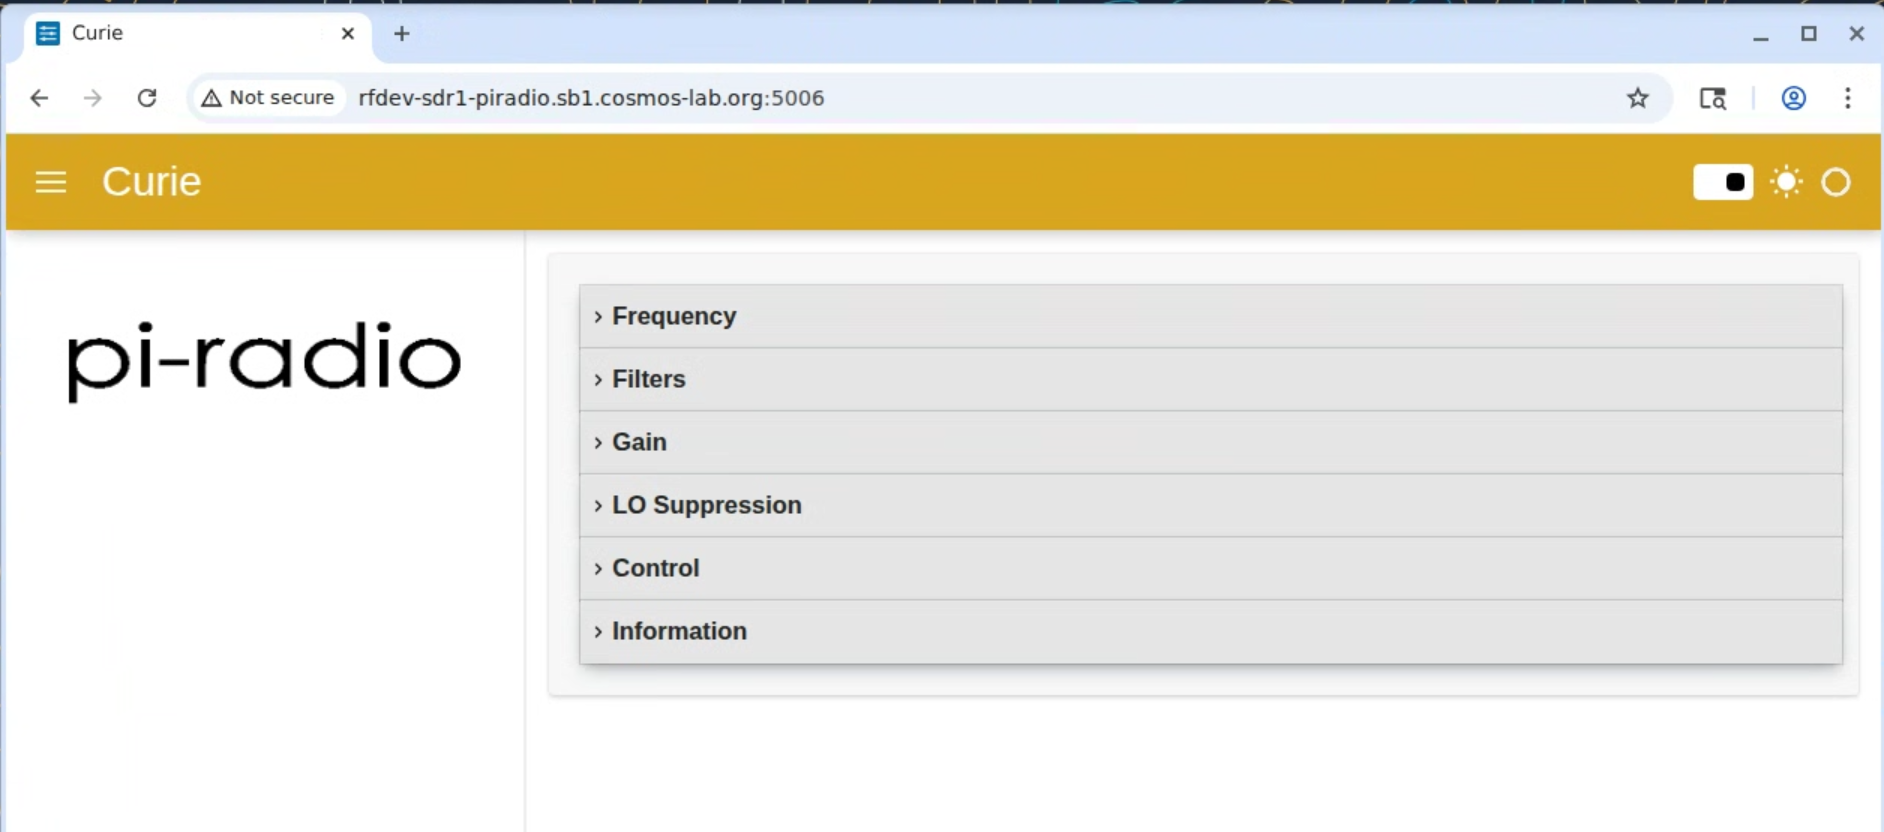
The Pi-Radio front-end exposes a browser UI with collapsible panels for Frequency, Filters, Gain, LO Suppression, Control, and Information. The landing view shows these sections and provides quick navigation for common RF tasks.

Collapsible panels for: Frequency, Filters, Gain, LO Suppression, Control, and Information. Use these to tune LOs, select per-chain filters and gains, adjust LO leakage nulling, and toggle board-level options.
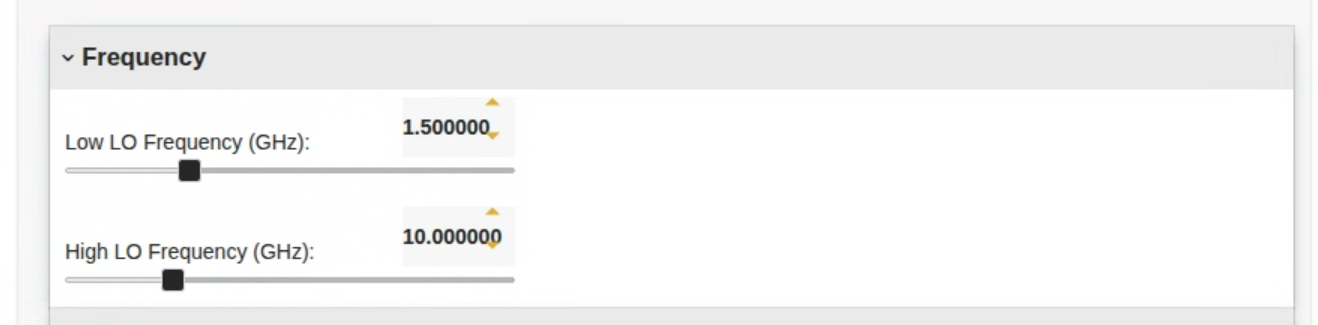
- Frequency settings panel: Two entries with sliders set the mixer local oscillators:
- Low LO Frequency (GHz) — sets the “low-side” LO used in the two-stage up/down-conversion chain.
- High LO Frequency (GHz) — sets the “high-side” LO.
Use the numeric box for fine increments and the slider for coarse moves. Together, these LOs place the desired FR3 RF channel while keeping IF in the supported sub-6 GHz range.

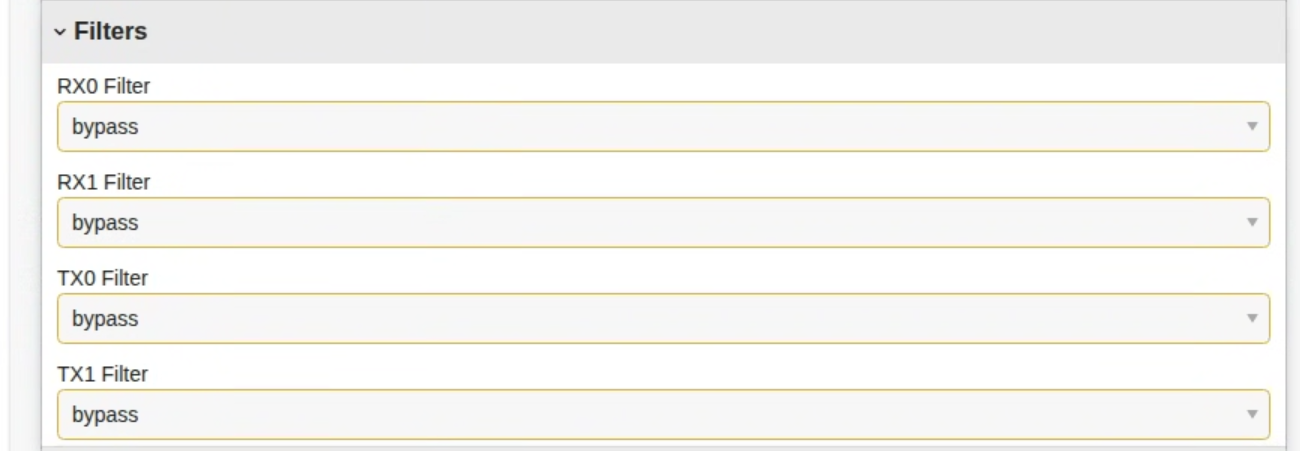
- Filters panel: Per-chain drop-downs select the active RF/IF path for RX0, RX1, TX0, and TX1. The bypass option routes around the filter network; select a non-bypass entry to engage the appropriate bandpass path for that chain.

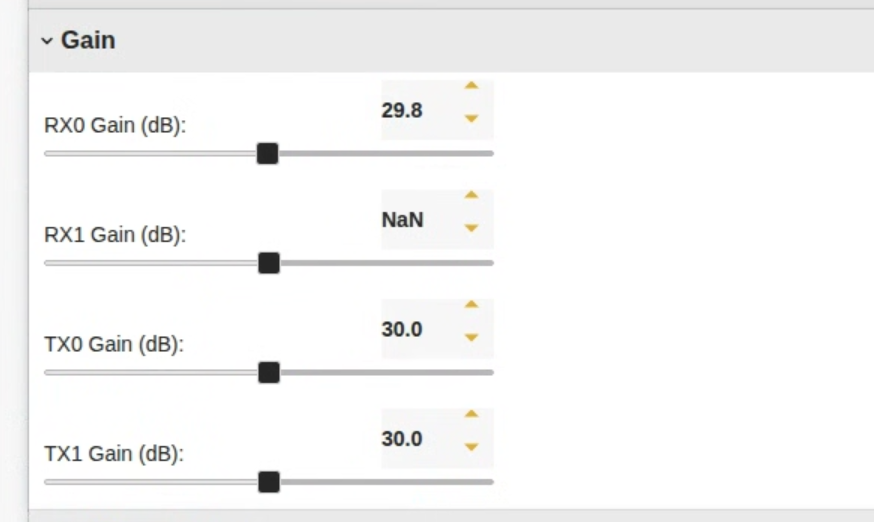
- Gain panel: ndependent gain controls (in dB) for RX0, RX1, TX0, and TX1. Adjust with the slider or type a value in the numeric box. Use modest steps to avoid clipping or over-driving the front-end.

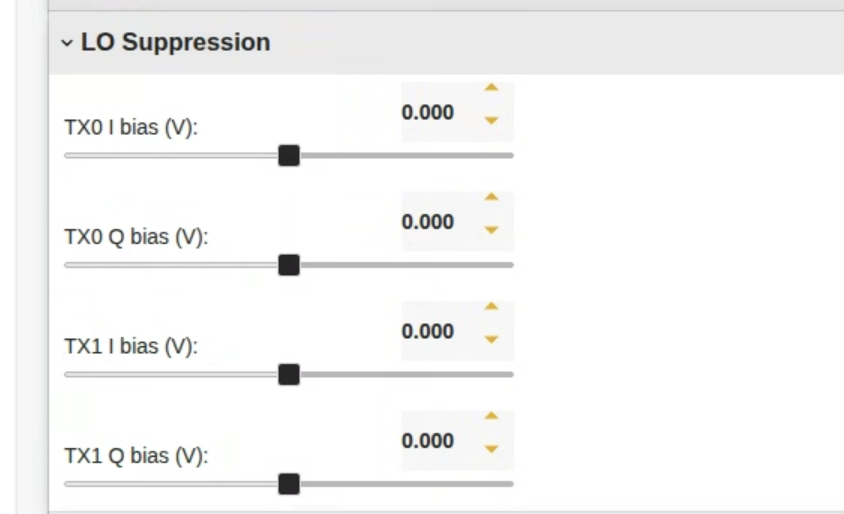
- LO Supression: DC bias trims for the I and Q paths on each TX chain (TX0 I/Q bias, TX1 I/Q bias, in volts). Small adjustments here null residual LO feed-through and balance IQ, reducing the tone at the carrier when the transmitter is idle. Start near 0 V and sweep slowly while observing the carrier leakage.

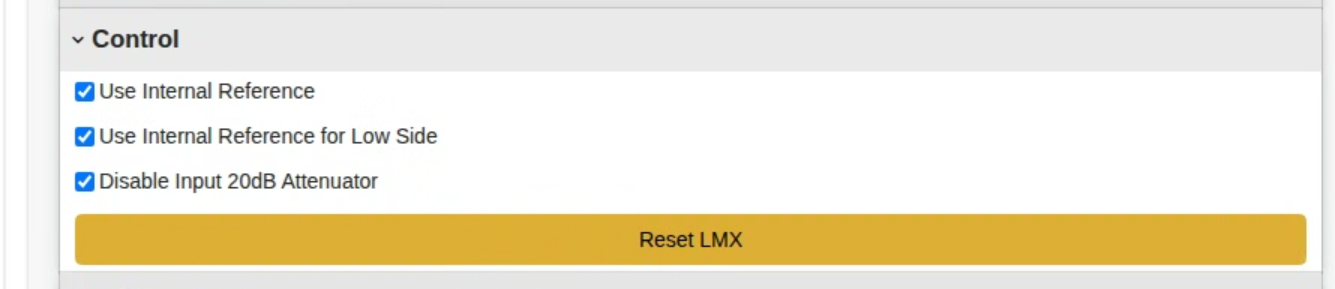
- Unit controls:
- Use Internal Reference — lock synthesizers to the on-board reference; clear this if using an external reference.
- Use Internal Reference for Low Side — apply the internal ref to the low-side LO as well.
- Disable Input 20 dB Attenuator — toggles the on-board input pad; uncheck to insert 20 dB of protection when measuring strong signals.
- Reset LMX button — re-initializes the LO synthesizer(s) to recover from configuration changes.

Tutorials
- Basic Narrowband (UHD-based) Transmiter and Monitor
- Analog FM Link with GNURadio
- Basic OFDM Link with GNURadio
- Amarisoft 5G over FR3
Attachments (7)
- FR3-BD.png (175.5 KB ) - added by 11 months ago.
-
pi-browser.png
(350.8 KB
) - added by 11 months ago.
Pi-Radio FR3 Web-based Control Interface
- pi-frequency.png (129.9 KB ) - added by 11 months ago.
- pi-filters.png (132.3 KB ) - added by 11 months ago.
- pi-gain.png (135.3 KB ) - added by 11 months ago.
- pi-suppression.png (117.2 KB ) - added by 11 months ago.
- pi-control.png (107.3 KB ) - added by 11 months ago.
Download all attachments as: .zip