Site Navigation
- COSMOS Testbed Overview
- Getting Started
- COSMOS/ORBIT User Guide
- COSMOS Portal
- Account Management
- Portal Dashboard
- Directory
- Disk Images
- Community Forum
- Getting Started with the COSMOS Portal
- SSH Access to Testbed Nodes
- Scheduler
- Testbed Status
- Installing Chrome Remote Desktop (CRD) on a Custom Image
- Tutorials
- Architecture
- Resources, Services and APIs
- Datasets
- Hardware Info
- RF Policies & Compliance
Analog FM Transmission Over FR3
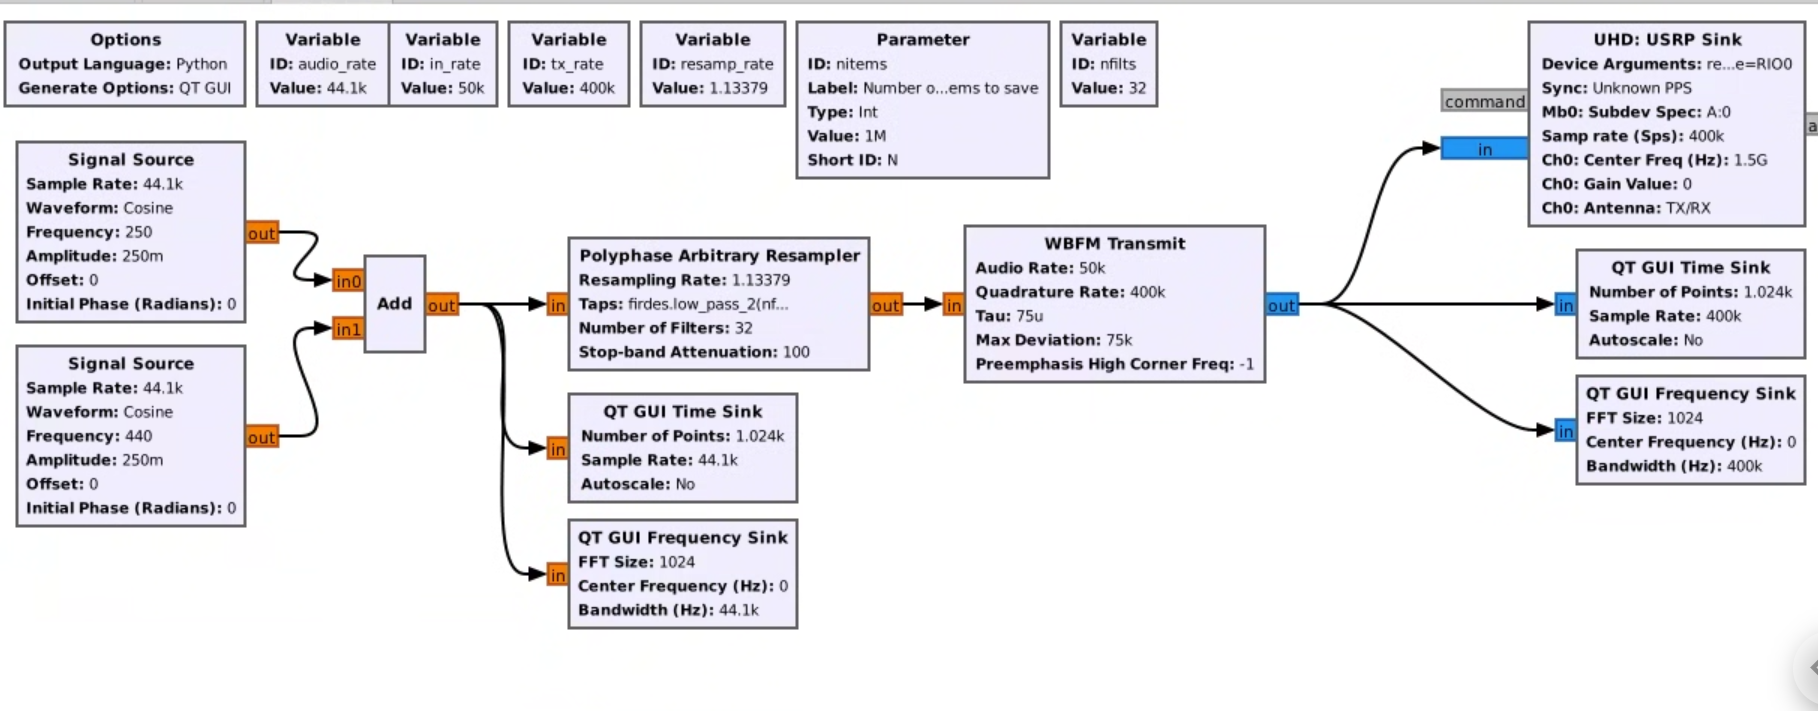
This experiment transmits an analog FM signal over the FR3 bands. The FM signal is generated at 1.5 GHz by the USRP-2974 (Krypton), up-converted by a Pi-Radio FR3 front-end and transmitted,in this example, at 10 GHz). A second Pi-Radio front-end down-converts this signal back to 1.5 GHz for a USRP-2974 receiver, that converts it back into analog baseband. The actual modulation and demodulations is done with a GNURadio running on 2974s. Pi-Radio web UI is used to configure the FR3 conversion.
Prerequisites
- COSMOS account and active reservation in Sandbox 1.
- Familiarity with USRP-2974 (embedded X310, 10 MHz–6 GHz, 160 MHz BW).
- FR3 hardware access (2×Pi-Radio FR3 front-ends) and the fr3-tutorials.ndz disk image for the USRPs.
- GNURadio familiarity
Resources required
- Nodes: sdr1-piradio, sdr2-piradio, rfdev-sdr1-piradio, rfdev-sdr2-piradio.
- Antennas: 2× Vivaldi (Tx/Rx) connected to the Pi-Radio front-ends. (See FR3 hardware pages for antenna layout.)
- Browser access to Pi-Radio web UI on the rfdev-* nodes (port 5006).
Tutorial Setup ===
Follow the steps below to gain access to the sandbox 1 console and set up nodes with appropriate images.
- If you don't have one already, sign up for a COSMOS account
- Create a resource reservation on COSMOS sandbox 1
- Login into sandbox 1 console (console.sb1.cosmos-lab.org) with an SSH sessions.
- Make sure all the resources in the domain are turned off:
omf tell -a offh -t system:topo:allres
- Load fr3-tutorials.ndz on sdr1-piradio and sdr2-piradio nodes.
omf load -i fr3-tutorials.ndz -t sdr1-piradio,sdr2-piradio
- Turn all the required resources (2 USRPs and 2 Pi-Radio SDRs) on:
omf tell -a on -t sdr1-piradio,sdr2-piradio,rfdev-sdr1-piradio,rfdev-sdr2-piradio
- Check the node status to confirm that the nodes are up.
omf stat -t sdr1-piradio,sdr2-piradio,rfdev-sdr1-piradio,rfdev-sdr2-piradio
- After a minute (giving internal PCs enough time to boot), ssh to the USRP 2974s nodes and start the chrome remote desktop session (follow the instructions for setting remote access).
- Open a Chrome browser sessions in each of the two CDRs and access the Pi-Radio configuration pages
 http://rfdev-sdr1-piradio.sb1.cosmos-lab.org:5006
 http://rfdev-sdr2-piradio.sb1.cosmos-lab.org:5006
Experiment Execution
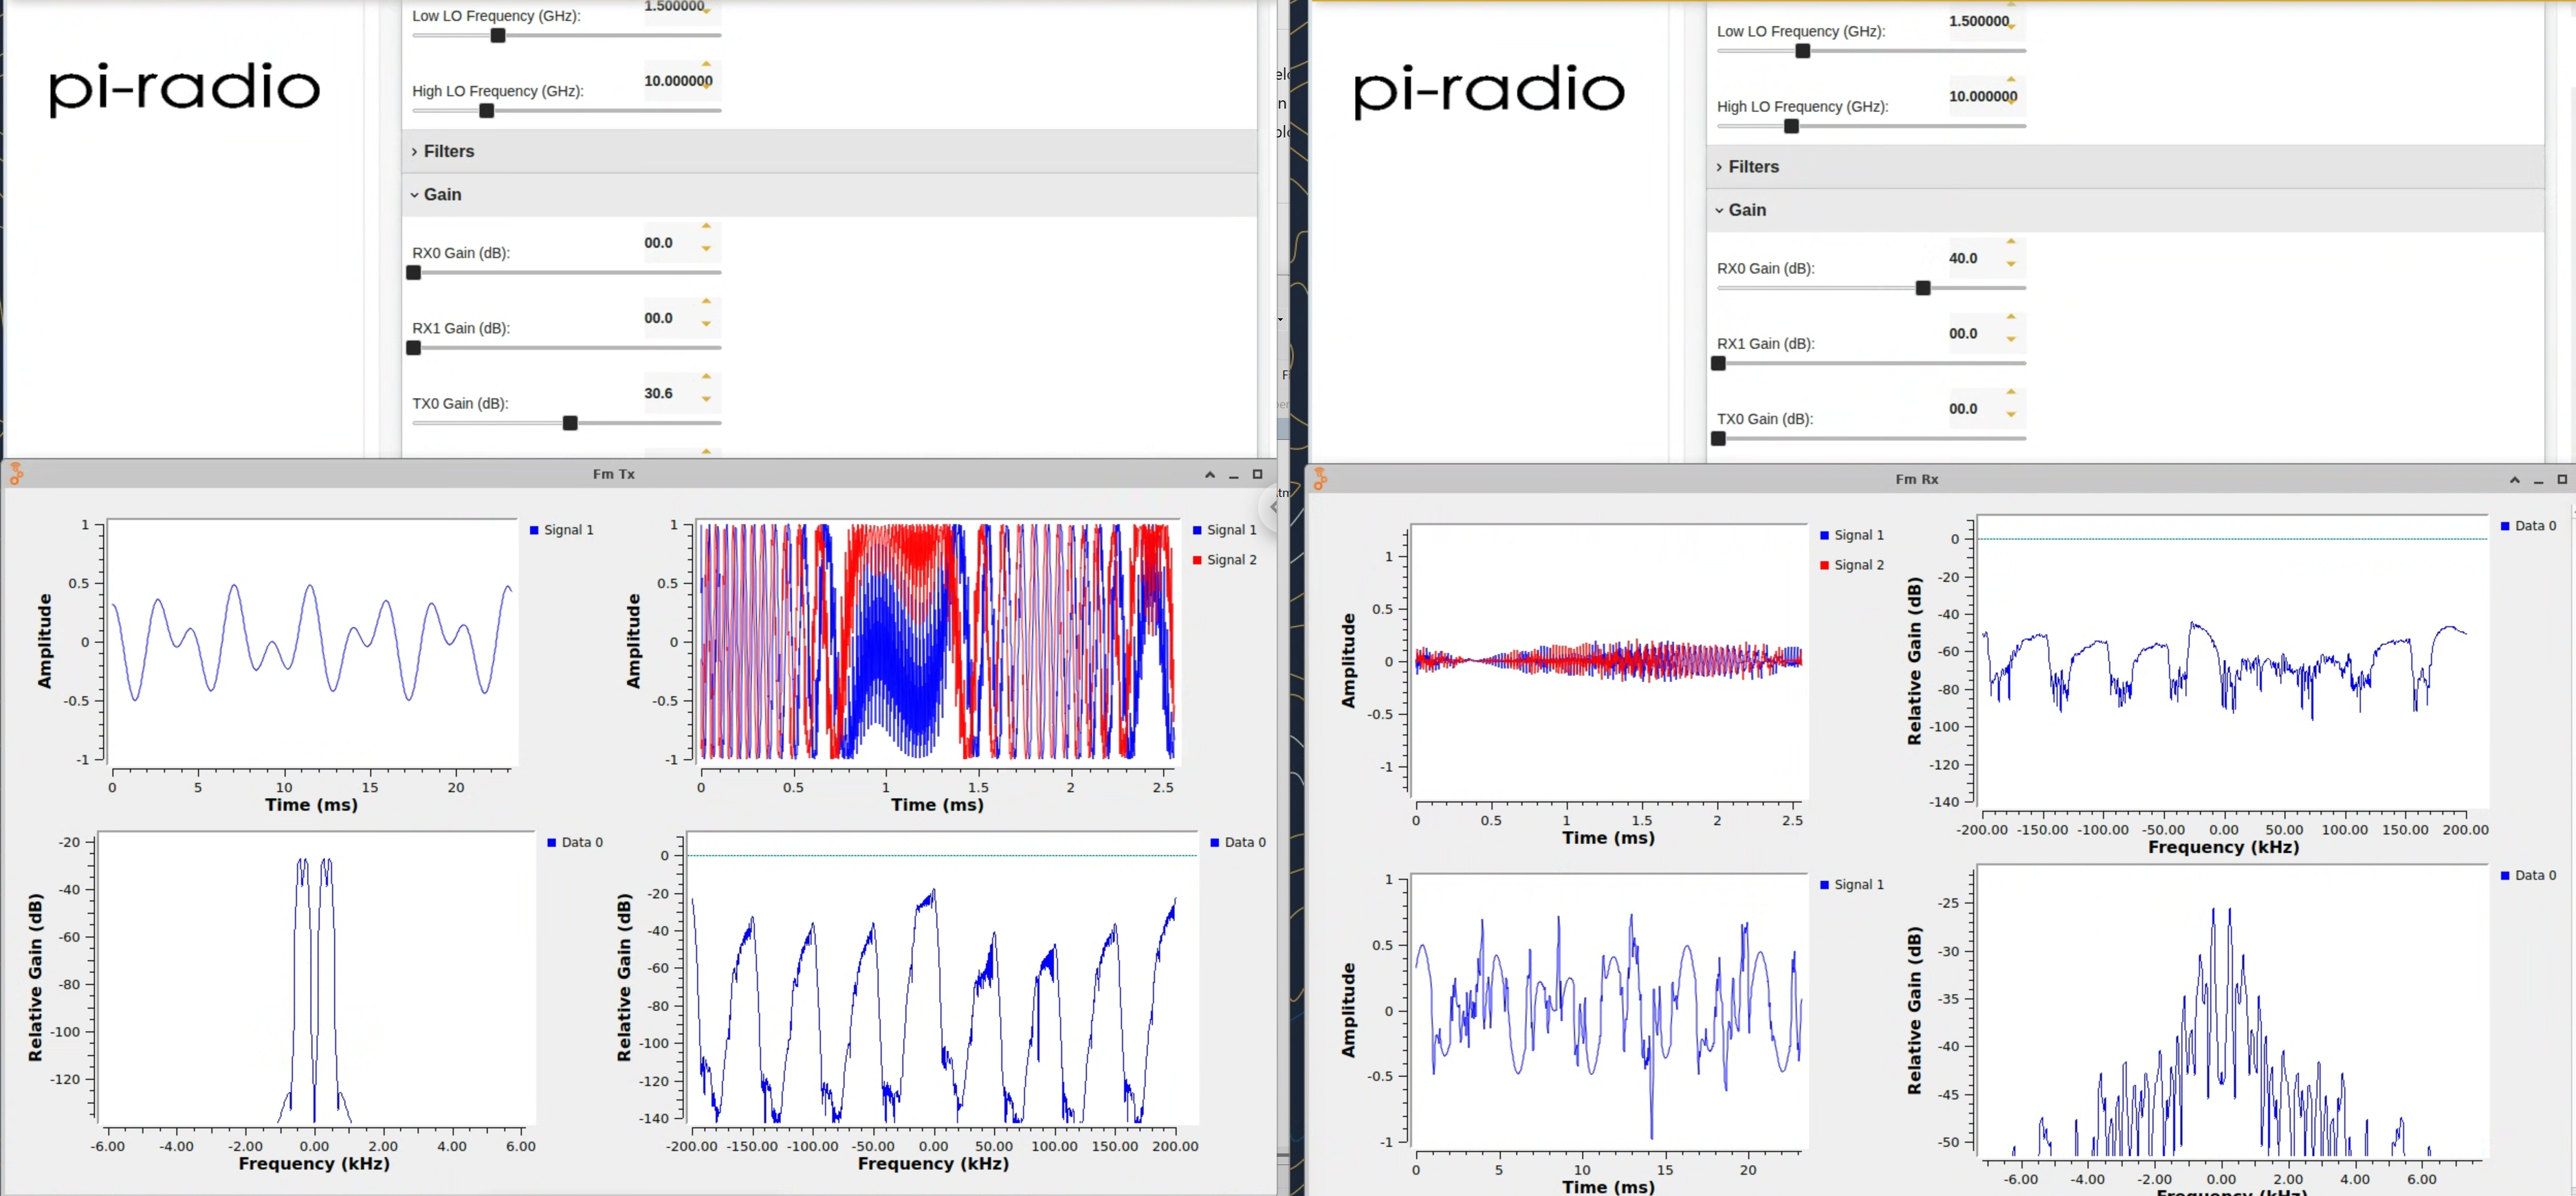
Use the Pi-Radio web UI Frequency panel on both rfdev pages (Tx and Rx) and set:
- Low LO Frequency (GHz): 1.500000
- High LO Frequency (GHz): 10.000000
This example pairs a 1.5 GHz IF with a 10 GHz high-side LO (and a 1.5 GHz low-side LO) to place the RF tone at ~10 GHz, and back to 1.5 GHz on the receive path. (Exact placement depends on mixer sign/paths; the screenshot below shows the working settings used in this demo.) Leave Filters, Gain (except where noted), and LO Suppression at defaults for the first run.
GNURadio FM transmitter

GNURadio FM receiver

FM transmission

Attachments (3)
-
grc-fm-tx.png
(755.9 KB
) - added by 11 months ago.
GNURadio FM Transmitter
-
grc-fm-rx.png
(483.3 KB
) - added by 11 months ago.
GNURadio FM receiver
- fm-tx-rx.png (2.6 MB ) - added by 11 months ago.