Site Navigation
- COSMOS Testbed Overview
- Getting Started
- COSMOS/ORBIT User Guide
- COSMOS Portal
- Account Management
- Portal Dashboard
- Directory
- Disk Images
- Community Forum
- Getting Started with the COSMOS Portal
- SSH Access to Testbed Nodes
- Scheduler
- Testbed Status
- Installing Chrome Remote Desktop (CRD) on a Custom Image
- Tutorials
- Architecture
- Resources, Services and APIs
- Datasets
- Hardware Info
- RF Policies & Compliance
Basic usage
Description
In this tutorial we'll demonstrate how to navigate from the COSMOS sandbox to a single SDR on a node and run an application to read samples from the SDR.
Prerequisites
In order to access the test bed, create a reservation and have it approved by the reservation service. Access to the resources are granted after the reservation is confirmed. Please follow the process shown on the COSMOS work flow page to get started.
Resources required
This tutorial can be run from sb1.cosmos-lab.org using one SDR - either a PCIe-based USRP 2974 or the network based N310.
Tutorial Setup
Follow the steps below to gain access to this console and set up your node with an appropriate image.
| |
|
|
omf load -i baseline-uhd.ndz -t sdr2-s1-lg1 | omf load -i baseline-uhd.ndz -t srv1-lg1 |
| |
|
|
omf tell -a on -t sdr2-s1-lg1 omf stat -t sdr2-s1-lg1 | omf tell -a on -t srv1-lg1 omf stat -t srv1-lg1 |
| |
|
|
ssh root@sdr2-s1-lg1
| ssh root@srv1-lg1
|
Experiment Execution
Configure and detect the radio
The USRP 2974 is a PCIe based SDR while the N310 is network based. The instructions are slightly different for setting up communications to each type of SDR. Please follow the appropriate column.
|
|
|
|
Configure and run the application
- Go back to SandBox1 console, download the application source code from the attachment section below and copy it to the SDR.
username@console:~$ wget https://wiki.cosmos-lab.org/raw-attachment/wiki/Tutorials/Wireless/BasicUsage/spectrum_view.tar.gz
username@console:~$ scp spectrum_view.tar.gz root@sdr2-s1-lg1:~/
- Untar the source code.
root@sdr2-s1-lg1:~# tar -zxvf spectrum_view.tar.gz
root@sdr2-s1-lg1:~# cd SPECTRUM_VIEW
- Please refer to the README file in SPECTRUM_VIEW directory for instructions on compiling and running the application. Before compiling install a few required libraries.
root@sdr2-s1-lg1:~/SPECTRUM_VIEW# apt update
root@sdr2-s1-lg1:~/SPECTRUM_VIEW# apt-get -y install libboost-program-options-dev libboost-system-dev libboost-thread-dev libboost-filesystem-dev libboost-regex-dev liblog4cxx-dev cmake libfftw3-dev libxml2-dev libpopt-dev libsqlite3-dev pkg-config libxml2-utils gnulib
- Now compile and make the websocket library.
root@sdr2-s1-lg1:~/SPECTRUM_VIEW# make websock
- Lastly compile the application - this will generate the executable app_read_sdr_samples that reads samples from the SDR.
root@sdr2-s1-lg1:~/SPECTRUM_VIEW# make
- Run the application - this will start a server that listens for commands to configure the radio and stream received spectrum samples.
root@sdr2-s1-lg1:~/SPECTRUM_VIEW# ./app_read_sdr_samples
. INFO  21:17:51.808 (main.cpp:649) - Starting command server at 5180
 INFO  21:17:51.808 (main.cpp:171) - Starting websock server at 9002
.....
Visualize spectrum samples
- Download the spectrum visualizer web client to your desktop. It is all in another zip file - spectrum_view.zip. Unzip this folder and open spectrum_view.html in a Chrome browser.
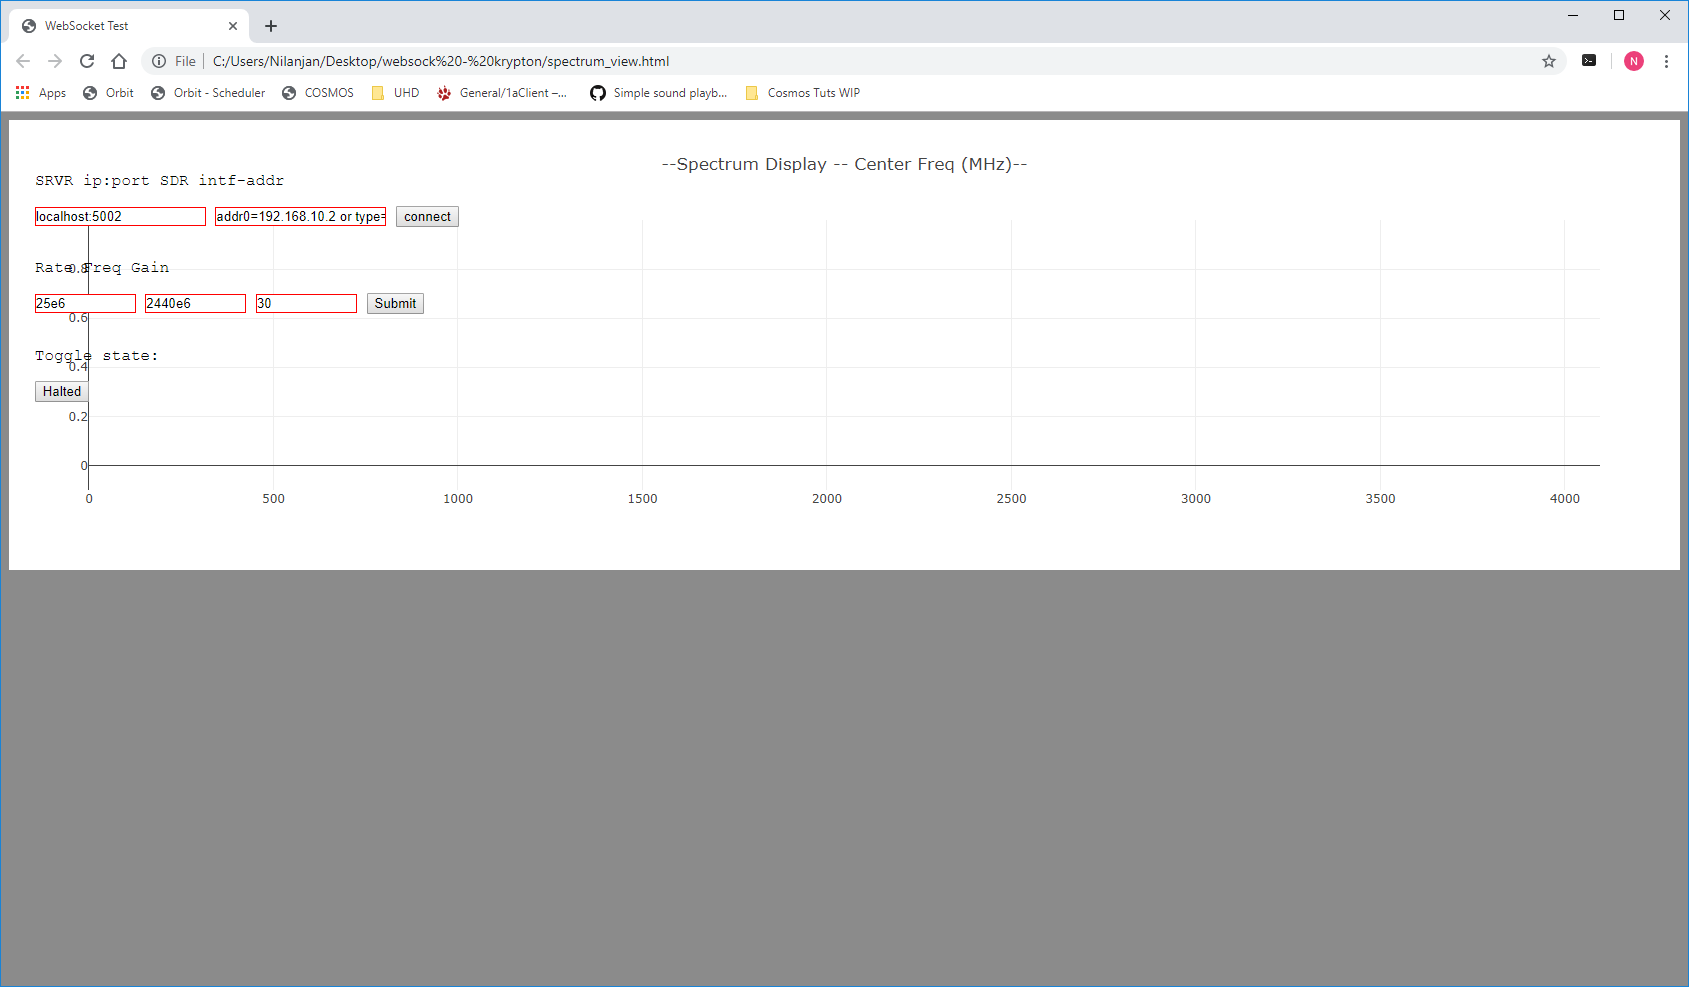
When the viewer is first opened, the page display should be similar to the following

|
|
|
|
Click the connect button once and a "Websocket Connection" statement should be output by the application.
Now click on make to create a device handle.
The RF radio parameters are already populated with default values for 2.4 GHz WIFI band. To view other active spectrum bands change the RATE, FREQ, GAIN fields.
RF Parameter value description RATE 25e6 Sampling rate FREQ 2400e6 Center frequency GAIN 30 Receive gain Then click on Submit to update the SDR.
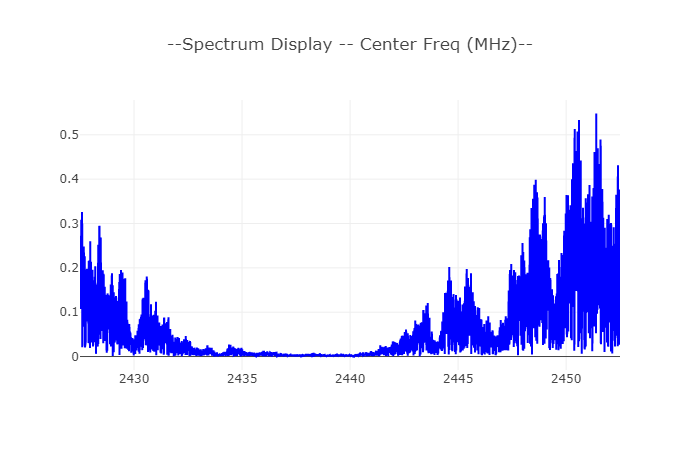
Click on the Halted button to begin streaming samples from the radio to the browser. The button should change to Running'. This should display the spectrum if all went well.

Troubleshooting
- Check the troubleshooting section in the Krypton usage page for common errors.